
Popcorn Ceiling Removal: Quick Summary
Removing a popcorn ceiling is straightforward with smart prep, wet-scraping, and patient finishing. Seal the room, mist small areas, scrape at a shallow angle, repair any nicks, then prime and paint for a modern, clean look.
- Wet-scrape the texture in controlled 4×4 ft sections to minimize dust.
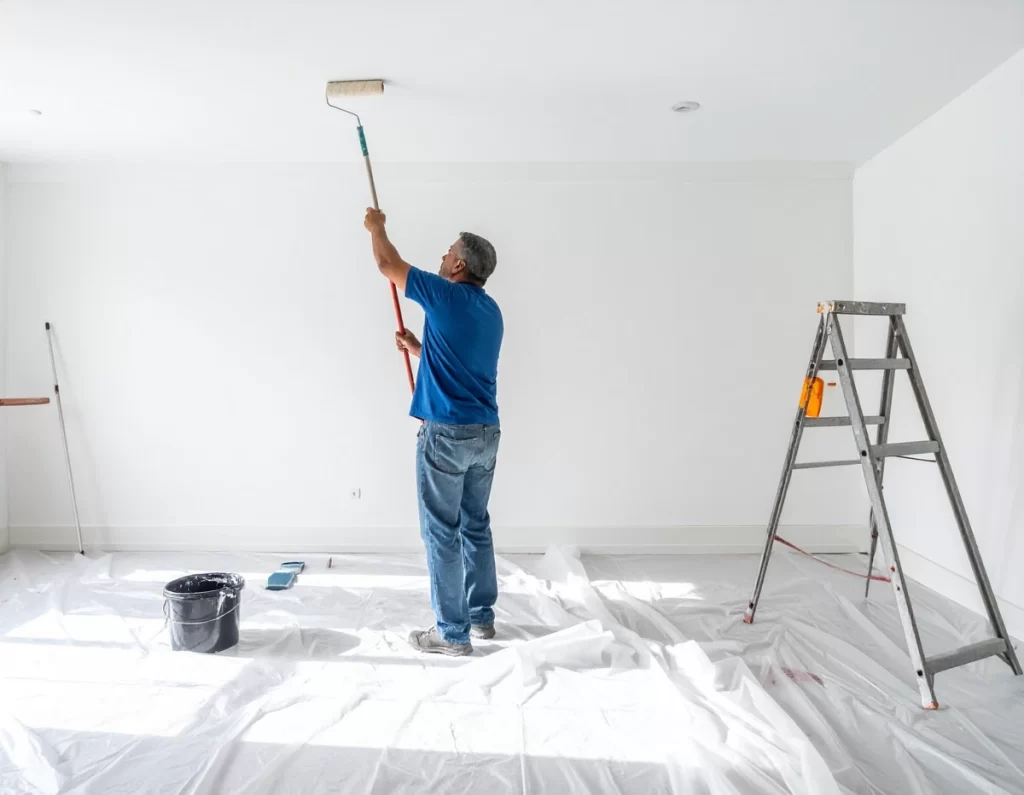
- Seal the space with plastic on floors, walls, and doorways before you start.
- Use a wide scraper at a low angle; re-mist stubborn areas instead of forcing it.
- Repair gouges, sand smooth, then prime with drywall primer to prevent flashing.
- Finish with paint or a skim coat for a perfectly smooth ceiling.
Installation Snapshot (Project Planner)
- Skill: Beginner–Intermediate (larger or vaulted rooms require more setup and patience)
- Time: 6–8 hrs (10×12 bedroom) → 10–12 hrs (15×20 living room) + ~24 hrs drying/curing
- Cost: $50–$150 in supplies; add $20–$40 if you need extra tools
- Savings vs Pro: ~$500–$1,500 depending on room size and local rates
- Pro Tip: Most time is in prep and cleanup—sealing the room well saves hours later.
Tools & Materials for Removing Popcorn Ceiling Texture
Tools
- Ceiling scraper or wide putty knife
- Spray bottle or garden pump sprayer
- Step ladder
- Sanding pole or drywall sander
- Utility knife
- Safety goggles and respirator (P100 preferred)
- Work gloves
Materials
- Plastic sheeting (floors/walls/doorways)
- Painter’s tape
- Drywall joint compound (for skim/repairs)
- Primer (drywall “PVA”) and ceiling paint
- Joint tape (if seams need touch-up)
- Buckets, rags, trash bags
How Hard Is It to Remove Popcorn Ceiling?
For a small bedroom, this is a manageable first-time DIY project—just messy. The real work is prep and cleanup: plastic sheeting and careful misting save you hours later. Large rooms or high/vaulted ceilings can feel overwhelming without a helper and staging. Avoid scraping too aggressively; it’s faster to re-mist than to repair gouges. If lab testing indicates asbestos, stop and hire a licensed abatement pro.
Popcorn Ceiling Removal — Step-by-Step Guide
Step 1 — Test for asbestos first
Textures from pre-1980s can contain asbestos. Carefully take a small sample and send it to a certified lab or use an EPA-approved kit. Do not scrape or disturb the ceiling until results confirm it’s safe; hire a pro if asbestos is present.
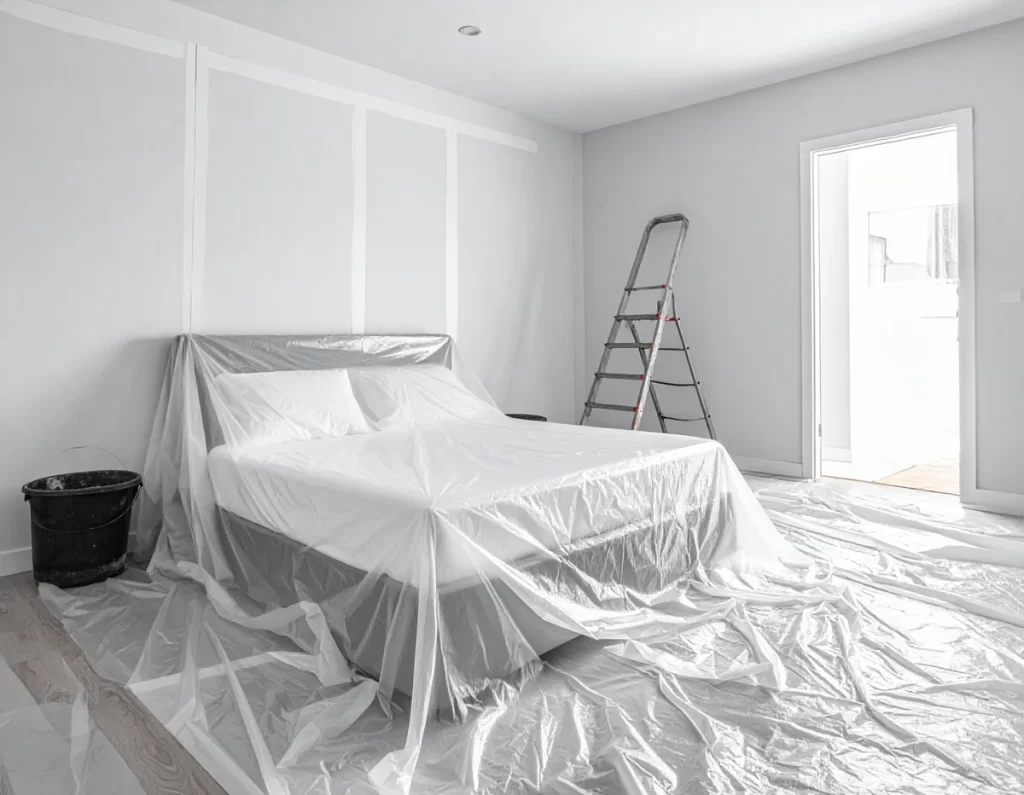
Step 2 — Prepare and seal the room
Remove or cluster furniture. Cover floors and walls with plastic, and tape edges tight. Hang plastic over doorways to contain debris and keep the rest of the house clean—time spent here saves hours later.
Step 3 — Gear up for protection
Wear goggles, a respirator (P100 preferred), gloves, and long sleeves. Even without asbestos, wet texture and drywall dust can irritate eyes, lungs, and skin. Suit up from the start and keep protection on through cleanup.
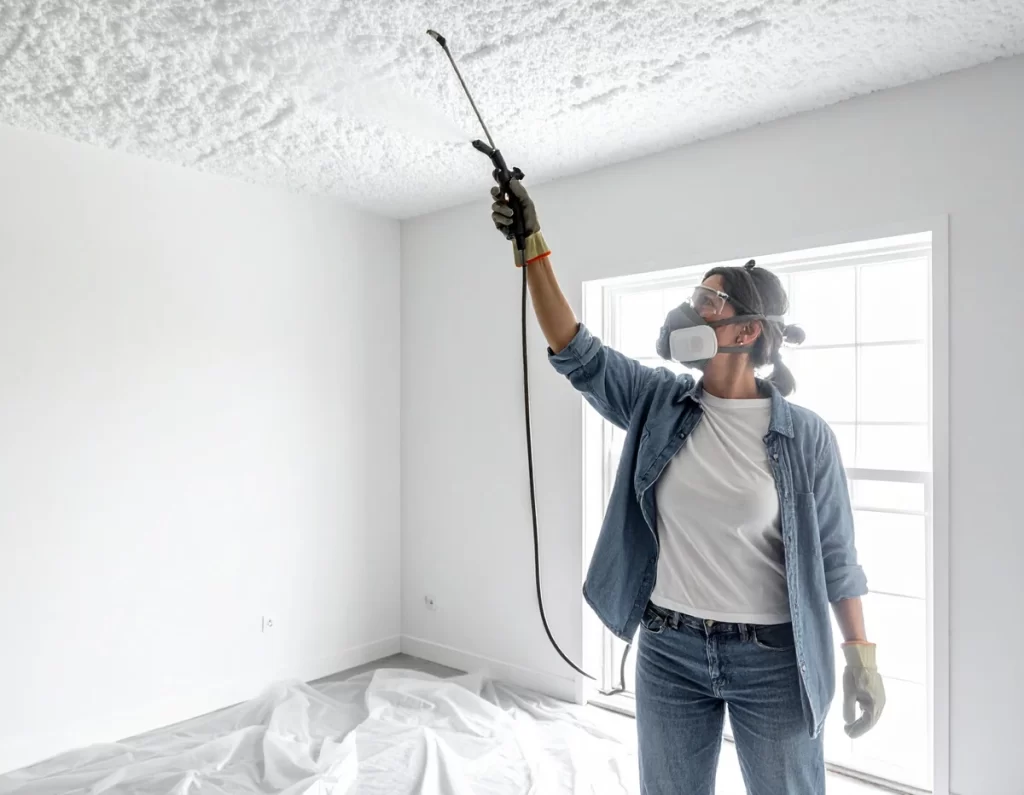
Step 4 — Lightly mist small sections
Spray a 4×4 ft area and wait 10–15 minutes so the texture softens. Work in small zones so areas don’t dry before you reach them; damp, not dripping, is the goal. Re-mist as needed to keep scraping smooth.
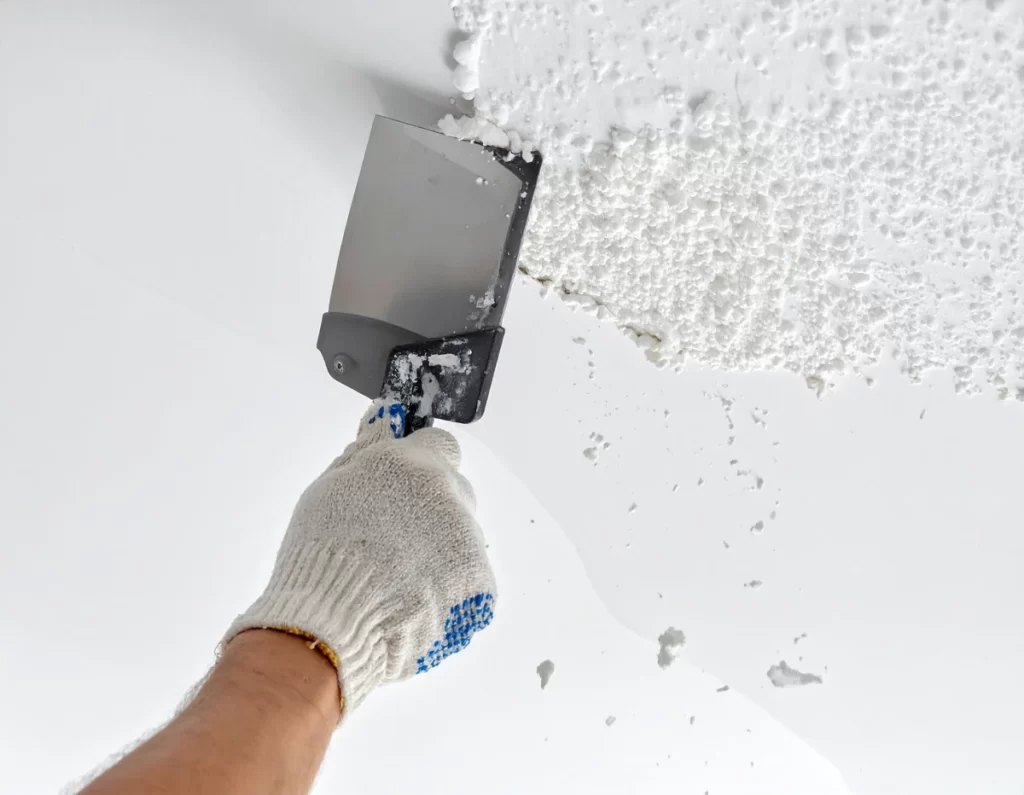
Step 5 — Scrape with a shallow angle
Use a wide scraper and push steadily across the damp surface. Keep the blade low to avoid gouging; if it resists, re-mist and wait rather than forcing it. Switch to a smaller putty knife at corners and around fixtures for better control.
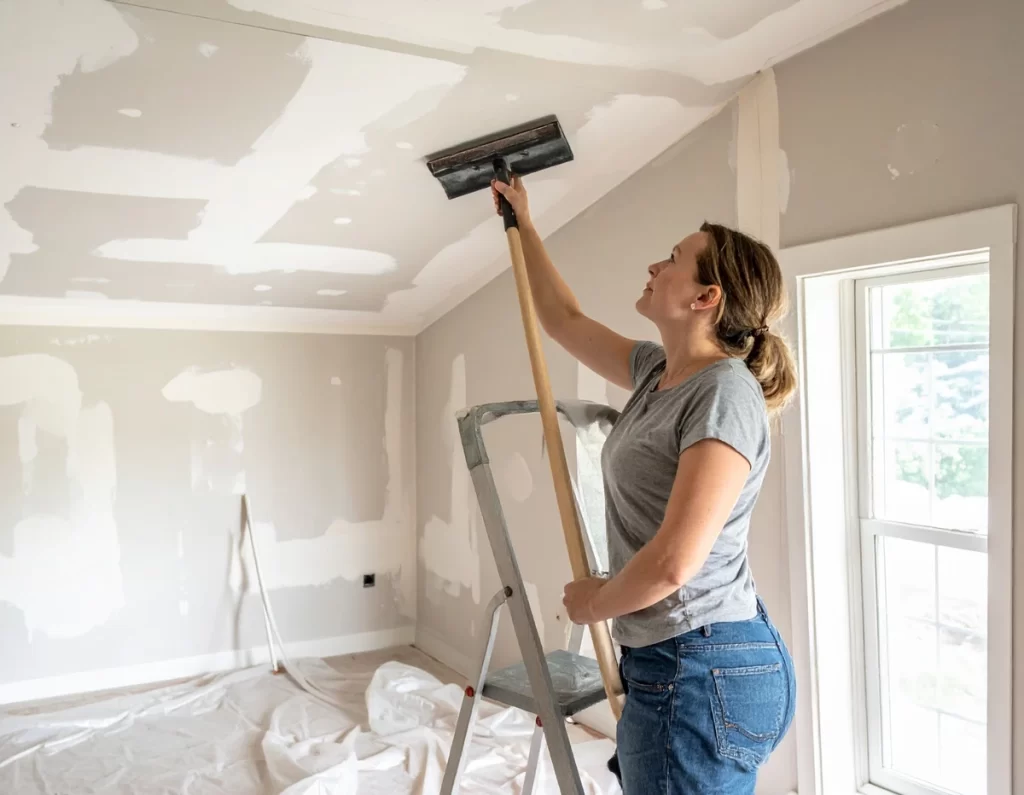
Step 6 — Repair, sand, and inspect
Fill nicks and low spots with joint compound and let it dry. Sand with a pole sander using long, even strokes; backlight the ceiling to spot remaining ridges and touch up as needed. Wipe down dust before priming.
Step 7 — Prime and finish
Apply a drywall primer to seal the surface and prevent flashing. Paint for a clean look, or skim coat first if you want a perfectly smooth, modern ceiling. Allow proper dry times between coats for the best finish.
Pro Tips for Smooth, Modern Ceilings
- Work in small sections so water doesn’t dry ahead of you.
- Keep the scraper flatter than you think; re-mist stubborn spots.
- Feather joint compound 8–12 inches for invisible blends.
- Backlight the surface with a work light to reveal ridges before paint.
- Prime with a drywall (PVA) primer to prevent flashing and uneven sheen.
- Consider covering with 3/8-inch drywall if the substrate is rough throughout.
- Plan cleanup: damp-mop dust and bag debris as you go to avoid tracking.
FAQs: Removing Popcorn Ceiling Texture
Can I just paint over a popcorn ceiling? You can, but the texture remains visible. For a smooth finish, removal or a skim coat is the better option.
How do I test for asbestos in a popcorn ceiling? Send a small sample to a certified lab or use an EPA-approved home test kit. Do not begin removal until you’re sure it’s asbestos-free.
Is it cheaper to remove or cover a popcorn ceiling? Covering with drywall or ceiling panels is cleaner and faster but often costs slightly more than wet-scraping.
What tools do I need to remove popcorn ceiling? A wide scraper, spray bottle or pump sprayer, plastic sheeting, painter’s tape, PPE (goggles/respirator), sanding pole, and joint compound for repairs.
Do I need to wet the ceiling before scraping? Yes. Lightly misting softens the texture, making removal easier and reducing dust.
How do I refinish the ceiling after removal? Repair and sand, then prime with a drywall primer. Paint for a clean look or skim coat first for a perfectly smooth finish.
How messy is popcorn ceiling removal? Very messy. Seal the room with plastic and wear proper PPE. Wet scraping helps reduce airborne dust.